
Step-by-Step Guide to Applying Splints & Casts
Learn the procedures, steps, risks, and requirements for applying splints and casts.

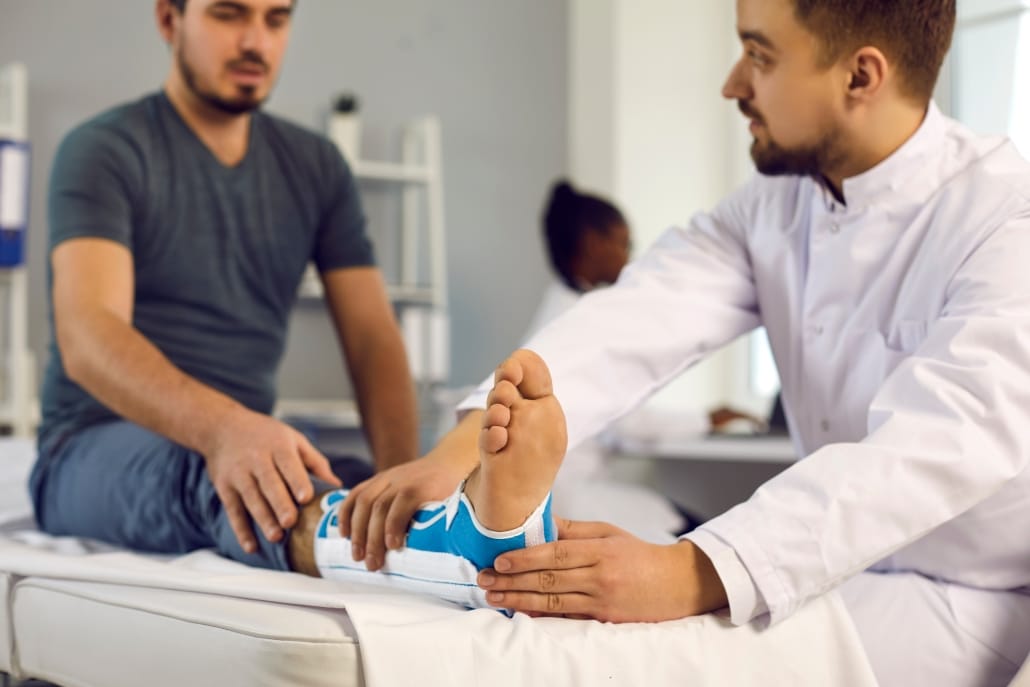
A cast or splint is used to immobilize a limb or joint. Casts and splints hold bones that have been reset in place while they heal. In addition, casts or splints may support damaged joints, usually after surgery. Splints are not traditionally used on broken bones as they allow too much movement for proper healing.
Not all nurses place casts and splints as part of their daily duties. But it can be a responsibility depending upon the work environment. Regardless, all nurses need to be proficient with casting and splinting.
Here’s more information about a nurse’s common duties.
In this blog, let’s get into the details involved with casts and splints.
What’s the Definition of a Cast or a Splint?
Casts and splints are orthopedic devices that protect and support broken or injured bones and joints. Casts and splints help immobilize the injured limb to keep the bone in place until it fully heals.
While similar, there is a difference between casts and splints. Casts are plaster or fiberglass. They are modeling to the injured limb’s shape, immobilizing the bone or joint.
Splints, sometimes called “half-casts,” don’t provide the same immobilization and support as casts. But they are faster and easier to use. Unlike a cast, a splint can also be tightened or loosened if swelling in the limb increases or decreases.
What Is the Purpose of Using a Cast or a Splint?
When a bone is broken, a cast or splint keeps it in place. They are also used following orthopedic surgery. After the initial injury, splints are often the first device used until swelling in the limb or joint decreases. At that point, a patient may need to switch to a full cast.
As healing progresses, a limb may become less swollen, making a cast somewhat loose. A splint may replace the cast during the remainder of the healing process.
Splints often support areas with soft-tissue injuries. This is because casts don’t allow enough flexibility for movement, which is necessary as part of the patient’s rehabilitation plan.
These are the common reasons to use a cast:
- Definitive fracture management
- Complex fracture management
These are the common reasons to use a splint:
- Simple or stable fractures
- Sprains
- Tendon injuries
- Other soft-tissue injuries
How Long Does it Take to Place a Cast or a Splint?
Splints can be placed quickly, usually in as few as 5 to 10 minutes.
Casts need more time, as the materials need to dry and harden. Fiberglass casts are the most common, and they have the added advantage of drying more quickly than the alternative material, plaster.
A fiberglass cast takes only 20 to 30 minutes to apply. The material dries in just 10-15 minutes, and the cast can bear weight 30 minutes after the initial creation of the cast.
In contrast, plaster takes from 24 to 72 hours to fully dry and be able to bear weight.

Who Places Casts and Splints?
There is variation between states on who can place splints and casts. Orthopedic surgeons and other doctors place most casts. Advanced practice registered nurses (APRNs) would be the exception, as they are usually allowed to cast and splint injured limbs and joints. In smaller markets, however, RNs may help the doctor with casting. Again, this varies with the state, the setting, and the circumstances. Nurses can apply splints.
Registered nurses often are asked by the doctor to remove a patient’s cast when the bone has healed.
Whether or not a nurse will be involved with placing a cast it’s part of the expected knowledge necessary for passing the NCLEX-RN exam. Click this link if you’d like to know more about preparing for the NCLEX-RN.
What Are the Training Requirements for Placing Casts and Splints?
As noted above, RNs don’t usually place casts. Usually, only APRNs are qualified to set bones and place casts. Still, casting and splinting are a part of all nurse training. There aren’t any specific certificates that apply to casting and splinting.
What Materials and Equipment Are Needed for Casting and Splinting?
There is debate about which material is better for creating a cast—plaster or fiberglass. Plaster has the advantage of its slower setting time, which allows more time to apply and mold the plaster before it fully sets. This slower set time also produces less heat, reducing patient discomfort.
Since its debut with casting tape in the 1970s, fiberglass has become popular because it produces less mess than plaster. Fiberglass is lighter than plaster, making larger casts more comfortable for the patient. Fiberglass is commonly used for nondisplaced fractures and severe soft-tissue injuries.
Here are the standard materials needed for casting and splinting:
- Adhesive tape (to prevent elastic wrap slippage with splints)
- Bandage scissors
- Basin of water
- Casting gloves (for fiberglass)
- Elastic bandage (for splints)
- Padding
- Plaster or fiberglass casting materials
- Sheets or underpads
- Stockinette (the first material placed on the limb to start the process)
What is the Procedure for Placing Casts and Splints?
Before beginning the process, ensure the doctor’s order is correct and that the patient has given consent. Gather the necessary equipment listed above, and then explain the process in detail to the patient.
The first step is to place a stockinette around the entire area to be covered by the cast or splint.
Now place the joint in its proper position of function. This helps to avoid wrinkling and subsequent pressure. For instance, a wrist should be placed in slight extension. An ankle should be at 90 degrees of flexion.
Add a layer of cotton or other soft material to protect the skin further. This padding also provides elastic pressure to help healing. When dealing with bony prominences and high-pressure areas, apply more padding.
Both plaster and fiberglass come in strips or rolls. These are then moistened and rolled out over the padding. Additional material is added as needed to build up the cast. It’s essential to avoid any tension and wrinkles when placing the layers. Lay them out without stretching the material.
The difference between creating a splint and a full cast comes down to coverage. A splint will not completely encircle the limb or joint; typically, it will provide stability on one side. Elastic bandages are then wrapped around the splint to secure it. On the other hand, a cast will encircle the limb, and the outer material will be hard to the touch when fully hardened.
The material begins to dry in 10-15 minutes. For plaster, it will take from 1 to 2 days to fully harden. You’ll need to educate the patient about this—if they place weight onto the cast before it is fully hardened, it may create cracks or even break the form.
As the materials begin to dry, there is a chemical reaction, which elevates the skin’s temperature. Again, this information to give the patient beforehand.

What Factors Can Affect Set Times for Plaster and Fiberglass?
The speed of hardening of a plaster or fiberglass cast or splint can vary depending on different factors.
These factors speed setting times:
- Higher temperature of the water in the dipping basin
- Use of fiberglass
- Reuse of dipping water
These factors slow setting times:
- Cooler temperatures in the dipping water
- Use of plaster
How Do You Lessen Pain and Swelling after a Cast or Splint Is Applied?
With smaller casts, there usually isn’t much pain involved, and swelling is minimal. But that may not be the case with larger casts. Here are tips to help the patient minimize swelling and pain.
- Keep the injured arm or leg elevated for 1 to 3 days after the cast or splint is applied. The goal is to have the injured limb higher than the patient’s heart. This helps fluids to drain, which decreases swelling.
- Apply ice to the cast or splint at the site of the injury. This ice must be in an ice pack or plastic bag, as there cannot be direct contact with the cast or splint. Also, be careful with condensation, as you don’t want the cast/splint to become damp.
Is There Recovery after Having a Cast or Splint Placed?
Swelling and initial pain, as described above, are the only aspects you could deem “recovery.” However, the entire healing process involves healing and recovery of the broken bone or damaged joint.
Patients will usually wear a splint for about three weeks. Casts are worn for more extended periods, from four to six weeks.
There is an element of patient education necessary to ensure proper management of the cast or splint. Patients need to understand that they must not place too much weight or pressure on the injured bone or joint. Any motion can impact healing or create a new injury.
What Are the Complications with Casts and Splints?
As with any medical procedure, there are some risks involved. One such issue is compartment syndrome. This complication is caused by a tight or rigid cast constricting a swollen limb. When the pressure builds inside the cast, it can cause damage to the muscles, nerves, or blood vessels in the area covered by the cast. This damage can be permanent.
Symptoms of compartment syndrome can include:
- Numbness or tingling in the affected limb
- Burning or stinging
- Cold or pale skin
- Skin with a bluish color
- Increased pain or swelling
Pressure sores may also develop under the cast. This is usually due to a cast that was too tight or didn’t fit properly, leading to excess pressure on an area under the cast.
How Are Casts and Splints Removed?
Doctors and nurses usually remove most casts. The cast is removed by using a special cast saw. This unique tool has a flat, rounded metal blade that vibrates. This vibration allows the saw to cut through the cast without injuring the skin underneath the cast. For larger casts, several cuts are made, and the cast is spread open. Then, another tool is used to lift it off. Surgical scissors cut through the protective padding and stockinette layers.

Pro Tips for Mastering the Art of Placing Casts and Splints
Placing casts and splints is an important area of injury care. While RNs don’t usually place casts, APRNs are. Plus, in some smaller environments, RNs will help throughout the process.
Here are a few tips to help you master the process:
- Use an appropriate amount of padding.
- Ensure you’re using the correct padding for the area.
- Be sure to pad bony prominences and pressure points.
- Be sure the limb or joint is positioned correctly throughout the application of the materials.
- Don’t create wrinkles when applying the padding and the cast/splint materials on top.
- Watch for areas where you’ve created tension and make adjustments.
- Avoid excessive molding and indentations.
- When the cast is hardening, it must be on a firm yet soft surface.
- Only touch a damp, hardening cast with your palms. Fingers create indentations.
- Educate the patient on cast care, the need to avoid overly stressing the limb or joint, and to not scratch under the cast. Scratching can lead to an infection under the cast.
Are You Ready to Make the Move Into a Nursing Career?
Whether the nurse is only involved with removing a cast or splint, or whether you’re an APRN who sets the bone, places the cast, and educates the patient, casting and splinting is an essential process for any aspiring nurse to understand.
If you’re considering making a career as a nurse, this is a great time to do so. There is a shortage of nurses in the United States, and there will be elevated demand for at least the next decade.
Brookline College has three outstanding nursing programs in Arizona and New Mexico to help you move into nursing. Here’s a link to our nursing programs.
